

This Model started as any model does, I strive not to make mistakes and to learn from my previous hurdles. The size of this bird meant I had to do something special and try techniques I had not encountered before. It was not until I made one of the engines that came with the kit the Jumo 211, that I fell in love with the detail and I couldn’t comprehend covering it in all the cowling. I had been used to buying small cheaper models, so here the detail was overwhelming.

What was better than one V12 engine? Two V12 engines. These two 1000hp power plants looked great. I had thought to having them mounted, with the open panels displaying All their glory.

That is when I started researching the Jumo 211 unit and found many detailed Pictures. While i was in this German rabbit hole I found a modeler called Jeroen Peters who found a picture of these power plants being transported. They were: ‘In Service Crates’. I read that Jumo 211 was the first “Kraftei” pre-packaged “engine module”. These were used in so many variations. Since the Daimler had a slight edge in a lightweight, single-engine application, this left the Jumo to fill in the remaining roles as a primary bomber engine.
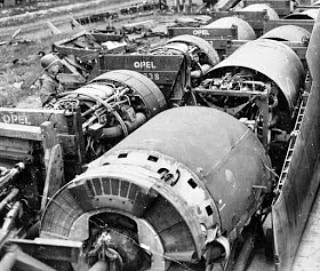
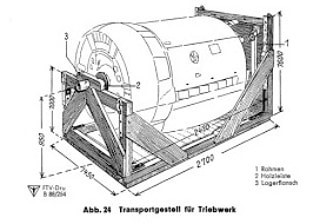
The picture showing the engines or “power eggs” shows them being transported in two methods. One is described as the service position and the other as the maintenance position. I decided this would be an excellent way of displaying one of the most iconic engines in WW2. I began to think how I could recreate this. Luckily, there is a place near me that gives free coffee stirrers. After filling my pockets, I began talking myself into making this crate by eye.

After fitting the engine into its cowling, I began making the crate around it. I used Balsa wood to cut the framework then used coffee stirrers to fill in the gaps and add the structure pieces. Small pieces of “U” track dowel and thin strips of plastic were used to make the metal mounts. Rivets were made by cutting tiny slithers off small plastic dowel. At this stage I was very happy and the idea of the diorama was getting bigger and more elaborate, “what else can I add” was all I thought.
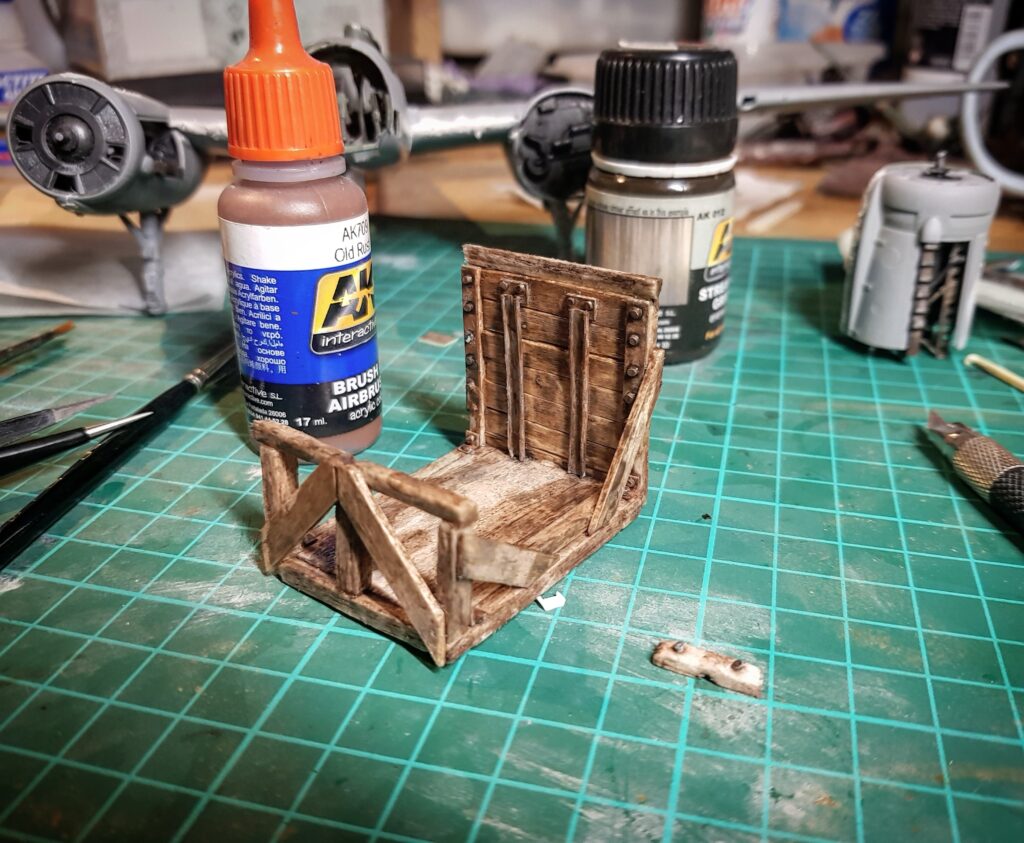
Painting and weathering raw wood always make me nervous, I tried to recreate a house once. I remember it was painted nigh on 6 different colours and in the end, I copied my neighbours’ fence. So, I practiced a few stains on some extra coffee stirrers I had lying around until I found one that I was happy with. I began to add some rust effect to the metal parts of the model, this was when the crate came to life. This was the first real thing I had scratch built and it looked as it was supposed to look, I fell in love. I thought this could be a diorama on its own I do not even need the plane, so the plane took a step back.
I focused on making this little V12 the best work/Diorama I had done to date. To do that, you have to stretch your abilities and try new techniques. For this, it was chipping, I had always seen the chipping on other modeler panels and aircraft and thought there is no way they do that with a brush. I haven’t the steadiest hand, so I did a few practices passes round the back and then threw the brush away. I found the best results was with a toothpick. Additionally, dry brushing was a new method using different pigments, paints to highlight and add shadows. The base was easy just pva and sprinkle some loose tuffs over it then I added some shop bought tuffs. If I were to do it again, I would blend the base better and add the wiring to the engine but other than that I am very happy.

Be the first to comment